Build the Piezospeaker Circuit
Building the Start/Reset Indicator Circuit
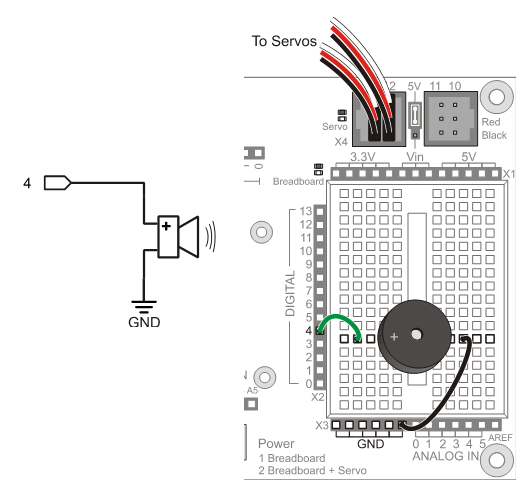
The picture below shows a wiring diagram for adding a piezospeaker to the breadboard.
Always disconnect power before building or modifying circuits!
Set the Power switch to 0.
Unplug the battery pack.
Unplug the programming cable.
- Build the circuit shown below. Position it just as shown on the breadboard. The speaker should stay in place for the rest of the book, while other circuits are added or removed around it.

(1) piezospeaker (just peel off the “Remove the seal after washing” sticker if it has one)
(misc.) jumper wires
Building the Start/Reset Indicator Circuit
The picture below shows a wiring diagram for adding a piezospeaker to the breadboard.
Always disconnect power before building or modifying circuits!
Set the Power switch to 0.
Unplug the battery pack.
Unplug the programming cable.
- Build the circuit shown below. Position it just as shown on the breadboard. The speaker should stay in place for the rest of the book, while other circuits are added or removed around it.

