Step 9 – Mount the Battery Pack
Mounting the Battery Pack
For All ActivityBot Robots.
Parts for this step:
- (1) Battery Pack, 5-cell AA (#753-00007)
- (2) White Nylon flat-head slotted screws (#710-00046)
- (2) 1-inch round alumninum standoffs (#700-00060
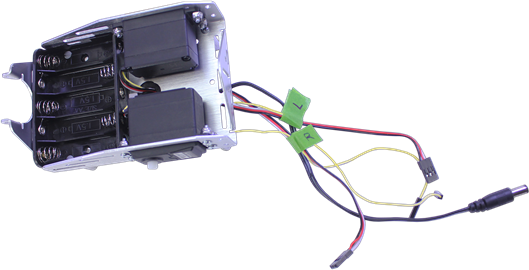
- Thread all the servo cables through the grommet hole to the top of the chassis to keep them out of the way.
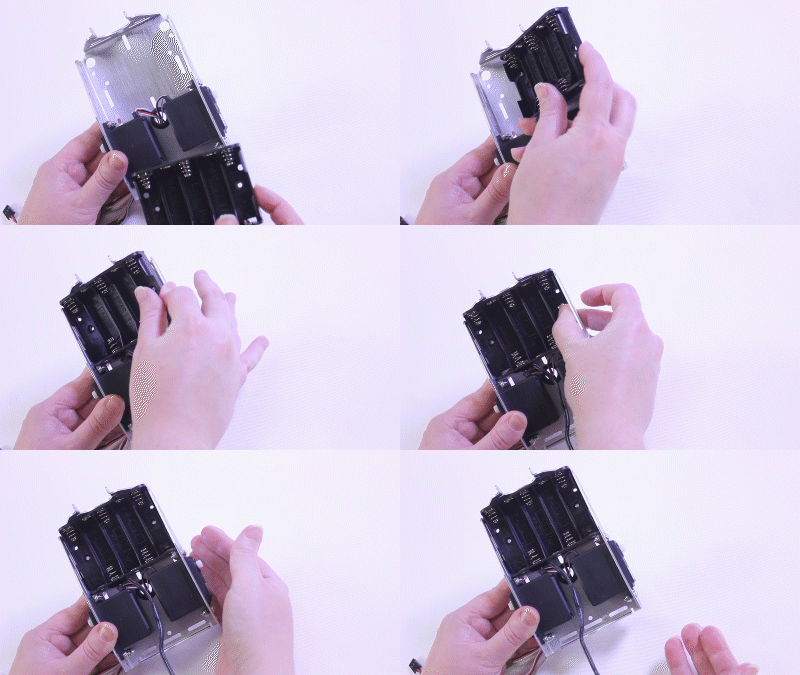
- Insert the battery pack inside the chassis with its plug end toward the grommet hole.
- The fit will be tight. You may need to insert one side and then push on the other side to snap it into place.

- Find two WHITE NYLON flat-head screws.
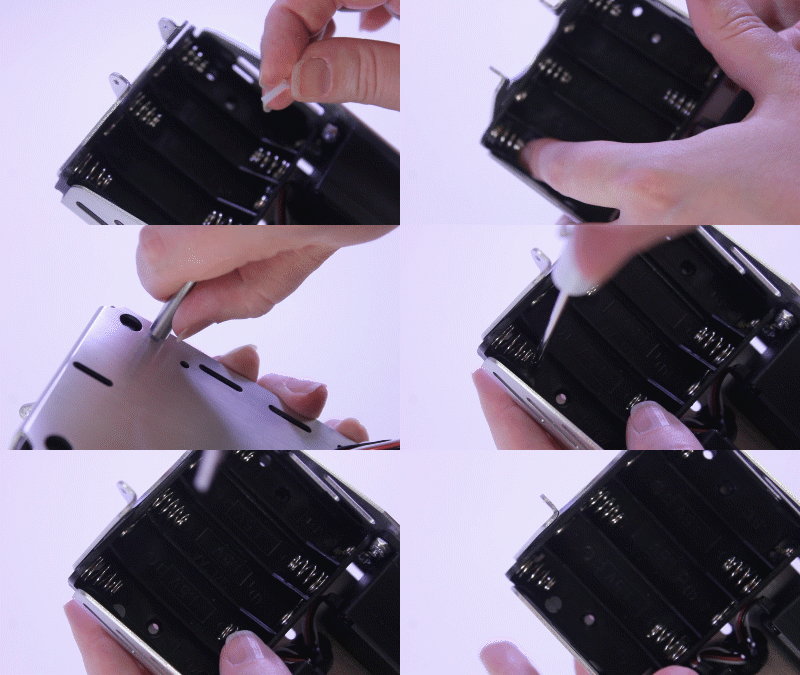
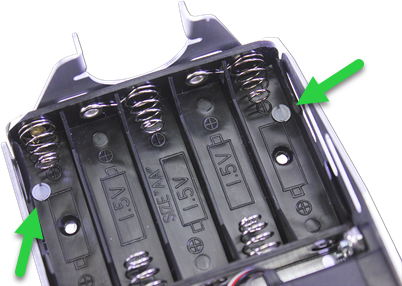
- Insert these screws into the holes inside of the battery pack that are closest to the corners, and out through the chassis.
- GENTLY twist a 1-inch metal standoff into each screw to hold it in place. Make it just snug but do not over-tighten or you may strip the screws.


- Thread the battery pack cable through the grommet hole to the top of the chassis.

For All ActivityBot Robots.
Parts for this step:
- (1) Battery Pack, 5-cell AA (#753-00007)
- (2) White Nylon flat-head slotted screws (#710-00046)
- (2) 1-inch round alumninum standoffs (#700-00060
- Thread all the servo cables through the grommet hole to the top of the chassis to keep them out of the way.
- Insert the battery pack inside the chassis with its plug end toward the grommet hole.
- The fit will be tight. You may need to insert one side and then push on the other side to snap it into place.

- Find two WHITE NYLON flat-head screws.
- Insert these screws into the holes inside of the battery pack that are closest to the corners, and out through the chassis.
- GENTLY twist a 1-inch metal standoff into each screw to hold it in place. Make it just snug but do not over-tighten or you may strip the screws.


- Thread the battery pack cable through the grommet hole to the top of the chassis.

